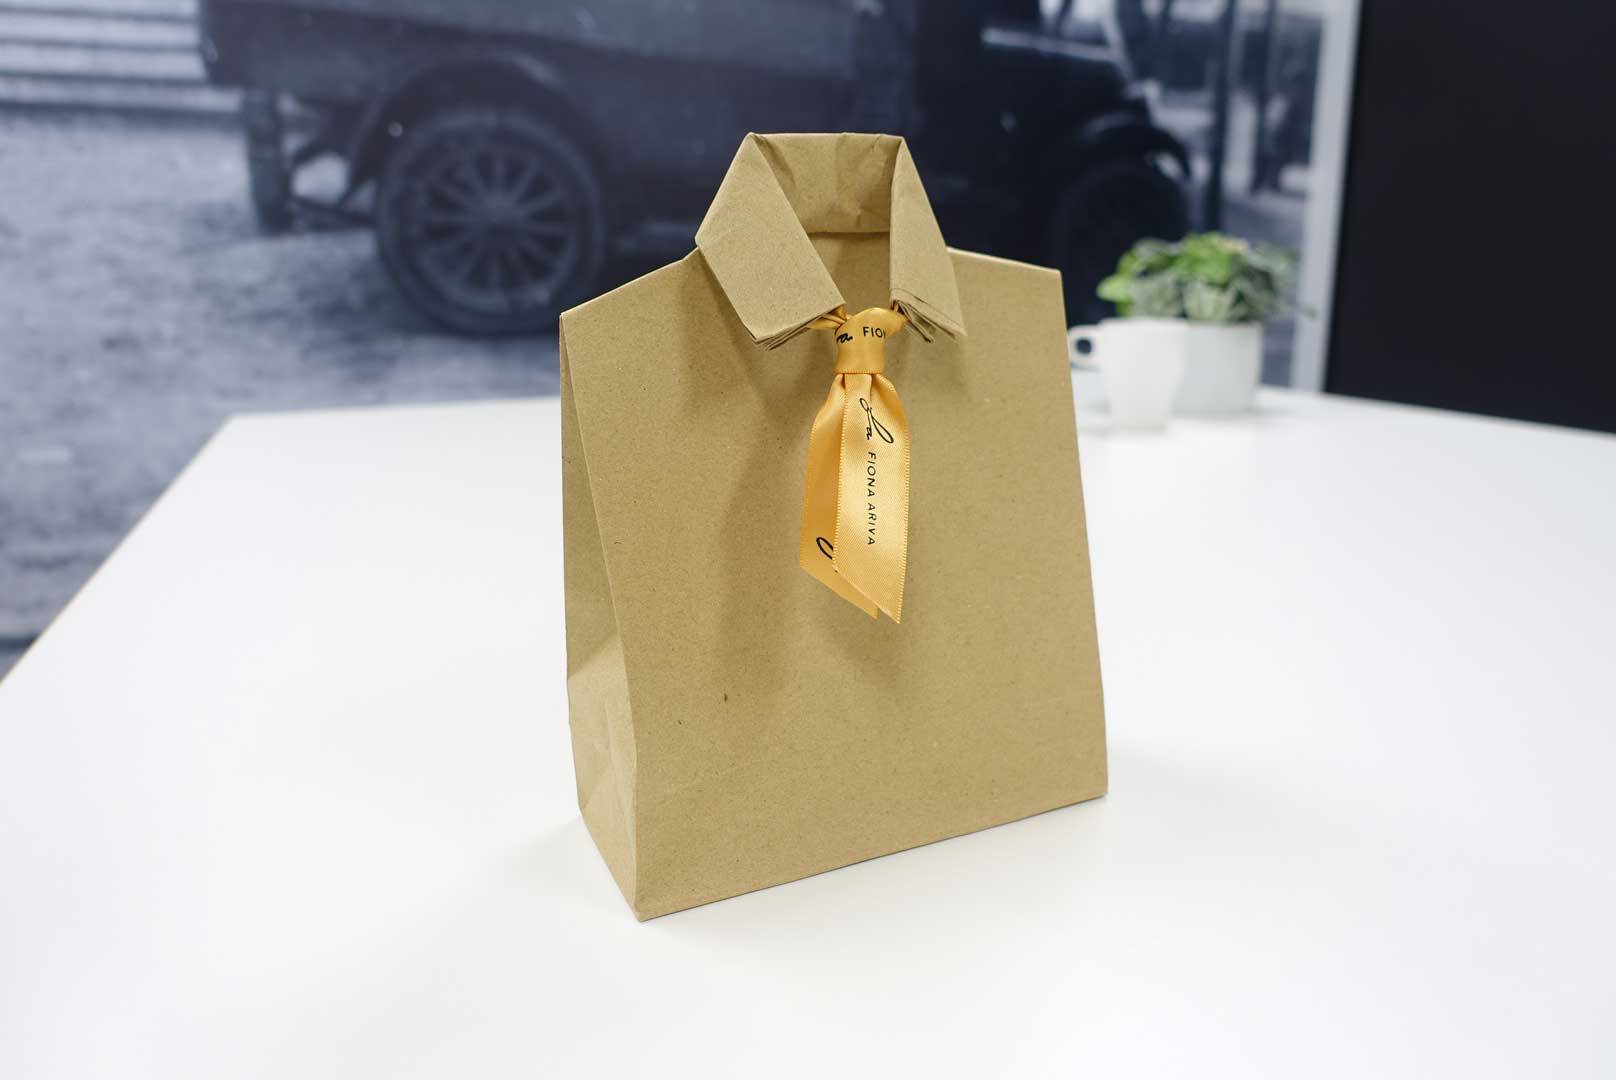
All you need is a paper bag, ribbon, and a pair of scissors for this tapeless, plastic-free gift wrapping idea.

How To: 'Shirt & Tie' Paper Bag Creative Gift Wrapping Tutorial
Start with a paper bag that has a gusset at the bottom so it can sit upright once you're done. Make sure it's big enough to comfortable hold your present inside.
- With your gift inside, gently lay the paper bag on the table with the opening facing towards you. For smoothest results, make sure the non-folded side (without the folded gusset) is facing upwards.
- Place a length of ribbon across the width of the paper bag, just under the opening of the bag.
- Fold the edge of the paper bag over twice, with the ribbon encased within it. The size of your fold should be based on the size of the bag but the width of your ribbon should be equal or smaller than the size of your folds.
- Using a pair of scissors, cut just beneath the folds, about 1/3 of the width of the paper bag, on each side.
- Fold the loose bits diagonally inwards towards the centre of the bag. This forms the collar of the "shirt".
- Pull the ends of the ribbon together and fasten a tie using your preferred type of tie knot.
- Trim the ends of the ribbon to finish the ends of the "tie".
- Neaten the "shoulders" of the shirt by folding each of the top corners of the bag backwards and diagonally downwards (to represent sloping shoulders). You can also glue or tape down these folds if you don't want anyone peeking inside.
Admire your work and look forward to impressing your gift receiver with your wrapping skills!
Hope you enjoyed this tutorial! I love seeing all the creative projects that you come up with! Feel free to send them via email, social media, or tag me (@fionaariva on Instagram)
For your gift wrapping adventures
Sold out
Sold out
Sold out


1 comment
Thank you for sharing! I’m going to make this for my dad, I’m sure he’ll love it!
Bentley
Leave a comment
This site is protected by hCaptcha and the hCaptcha Privacy Policy and Terms of Service apply.