Skip to content

Cart

Your cart is empty

Article: Fun and easy DIY ideas using reactive foil

Fun and easy DIY ideas using reactive foil
Crafting

Fun and easy DIY ideas using reactive foil

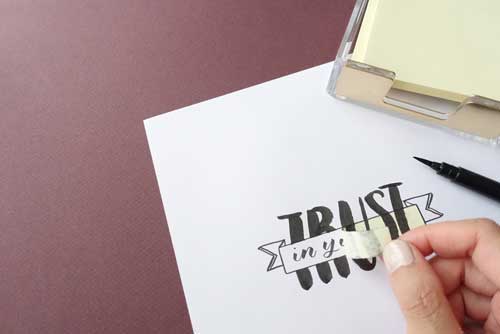
For those of you who foil your lettering, you probably find yourself wondering what to do with those leftover foiling scraps, which would be too wasteful to throw away. Here's some super simple ideas on what you can do with them. The best thing is, you don't even need a foiling machine for these!

For these projects, you will need I am using Heidi Swapp Minc reactive foils. They are the type of foil that normally sticks to printer toner.

Foiled, 'brush stroke' borders

Add a stroke of luxe to the edges of your writing paper. This could look amazing on wedding invites. It is important to wait until the glue has mostly dried before you peel away the foil. You can always refoil the patchy bits.

You will also need:

  • PVA/ craft glue (preferably the tacky/ quick-drying variety)
  • Dry, synthetic brush

Foiled, 'brush stroke' gift bags

This is the same technique as above, except I've used it to dress up a gift bag. It's the little details that make the difference between ordinary and extraordinary.


A post shared by Fiona Ariva (@fionaariva) on

Foiled, 'brush stroke' envelopes with window

This design will have your recipients wondering how you created this. They'll never guess that you just used the humble post-it sticky note! It could also be a gorgeous way to dress up place cards.


A post shared by Fiona Ariva (@fionaariva) on

Foiled gift tags with hole-punched heart

Create foiled embellishments for your gift tags, cards, wrapped presents.. anything you can think of!

You will also need: Foil, double-sided tape, hole punch (single shapes work best)


A post shared by Fiona Ariva (@fionaariva) on

Foiled place cards with two-tone hearts

This is a variation of the single-coloured heart embellishments idea above. I've used it to make place cards with a two-tone design for my party guests. Make your design pop by using contrasting colours.

You will also need: Foil, double-sided tape, hole punch (single shapes work best)


A post shared by Fiona Ariva (@fionaariva) on

I'll keep updating this page with more ideas so stay tuned! 

If you enjoyed these ideas, you might also like my easy watercolour background ideas for lettering or my art hacks using a post-it note!

1 comment

Original and inspiring ideas which are very easy to do, without requiring any expensive new tools. Well done.

Eva Bower

Leave a comment

This site is protected by reCAPTCHA and the Google Privacy Policy and Terms of Service apply.

All comments are moderated before being published.

Read more

Art hacks using a post-it note
Lettering & calligraphy

Art hacks using a post-it note

You can incorporate the humble post-it note with your lettering projects in pretty cool ways. Chances are, you'll find this household item lying around so let me show you some easy and sim...

Read more
Useful software and web tools for your calligraphy/ lettering/ creative e-commerce business
business

Useful software and web tools for your calligraphy/ lettering/ creative e-commerce business

Here it is! My no-frills list ...

Read more
}